| Looking for a better price on Bitdefender? Discount on renewal? Contact me paul@osh.co.za and we will help you out. |
Are you looking to test out Bitdefender for your corporate or school network? Do you have a mix of Windows, macOS and Linux desktops, laptops and servers? Well, this is a very simple tutorial that will get you up and running very fast.
We run through the setting up of a package on the GravityZone portal, and then get that package either downloaded or emailed to your staff.
We use these commands on Ubuntu Linux to deploy Bitdefender easily.
We normally download the full Linux Kit install rather than the Linux Downloader. This is due to the fact that the full downloaded archive is around 1.1gb and can be deployed to the target Linux machines or Servers via an SSH client or through a SAMBA share. Quite a few Linux Servers we deal with don't have access to the internet, and this makes the process simpler.
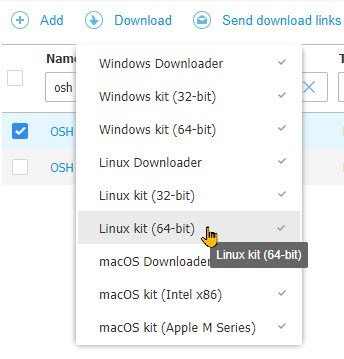
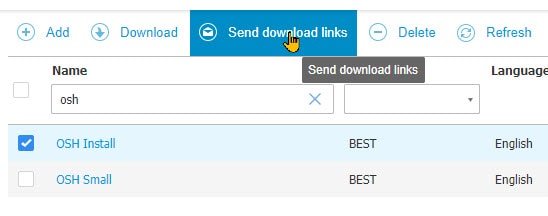
Are you looking to do this all from the terminal rather than using the UI to download the installation? Choose your package in the GravityZone Portal, select the install you are looking to install on Linux and tick the left-hand block. Click the Send download links icon in the action toolbar.
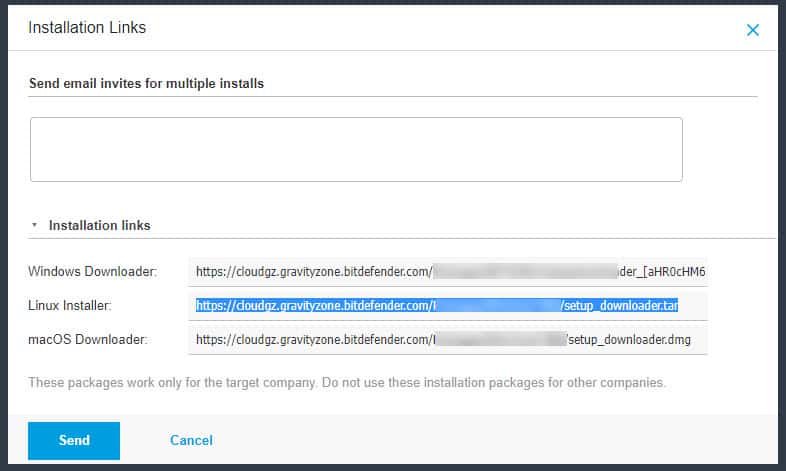
In the new window that opens, click the expanding arrow for Installation links section and copy the link for the Linux Installer.
Then just open a terminal and run a wget command.
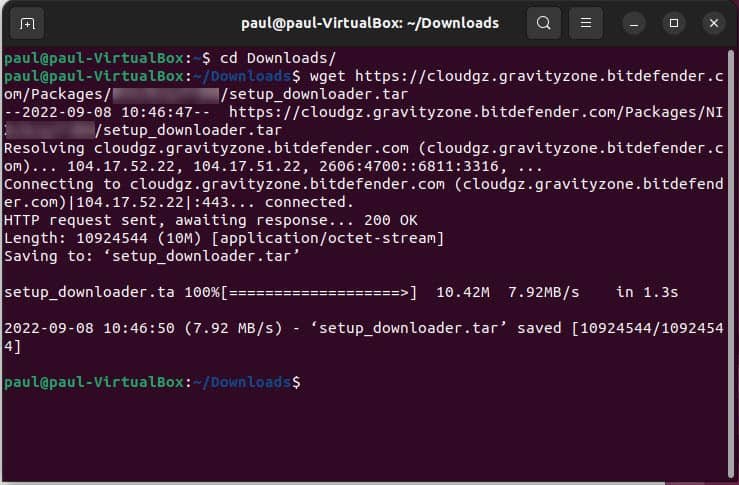
We are working on a Virtual Box Ubuntu Computer here. So we downloaded it directly from the GravityZone Portal into the Downloads folder.
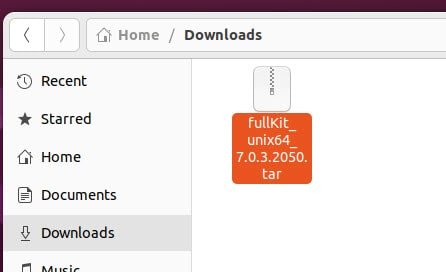
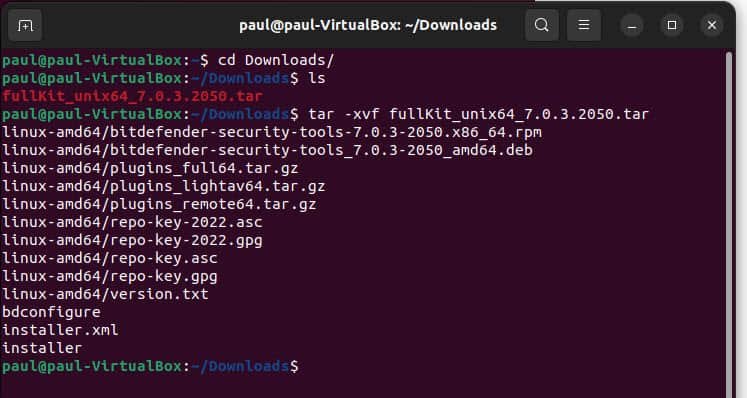
Open up a terminal on your Linux Install. The first step is to move to the folder that contains the Bitdefender Archive. To do this, I changed directory by typing "cd Downloads/". Your location might be different.
Once you have located the archive, you will need to untar (unzip) it. Using this command, "tar -xvf fullKit_unix64_7.0.3.2050.tar" extracted it into the downloads folder. Please note, that when you download your file, it will have a different name, please don't just copy and paste my command.
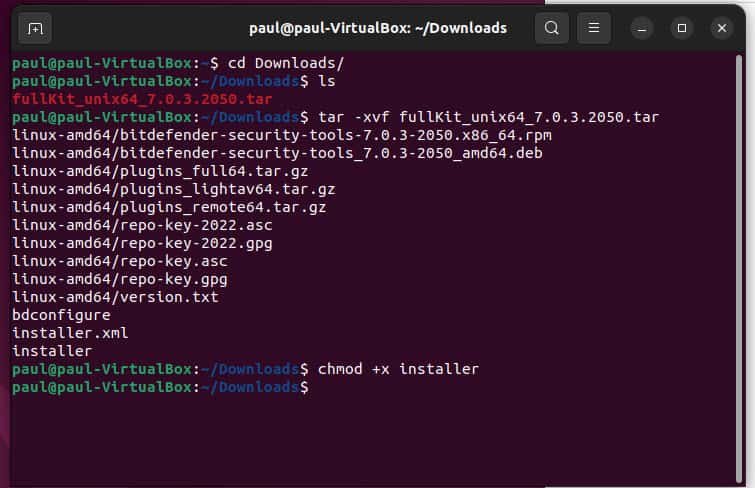
We need to now make the "installer" file an executable, by running this command.
chmod +x installer
We are now ready to install Bitdefender on our Ubuntu Linux. This needs to be installed using admin rights, please remember to include sudo.
sudo ./installer

Now that Bitdefener is installed, how do we check it is working? The easiest way is to check in your GravityZone Portal under the network and see if it is working.

Or if you want to communicate and manage Bitdefender with the terminal, you can check that the agent has been installed on the endpoint, with this command
systemctl status bdsec*
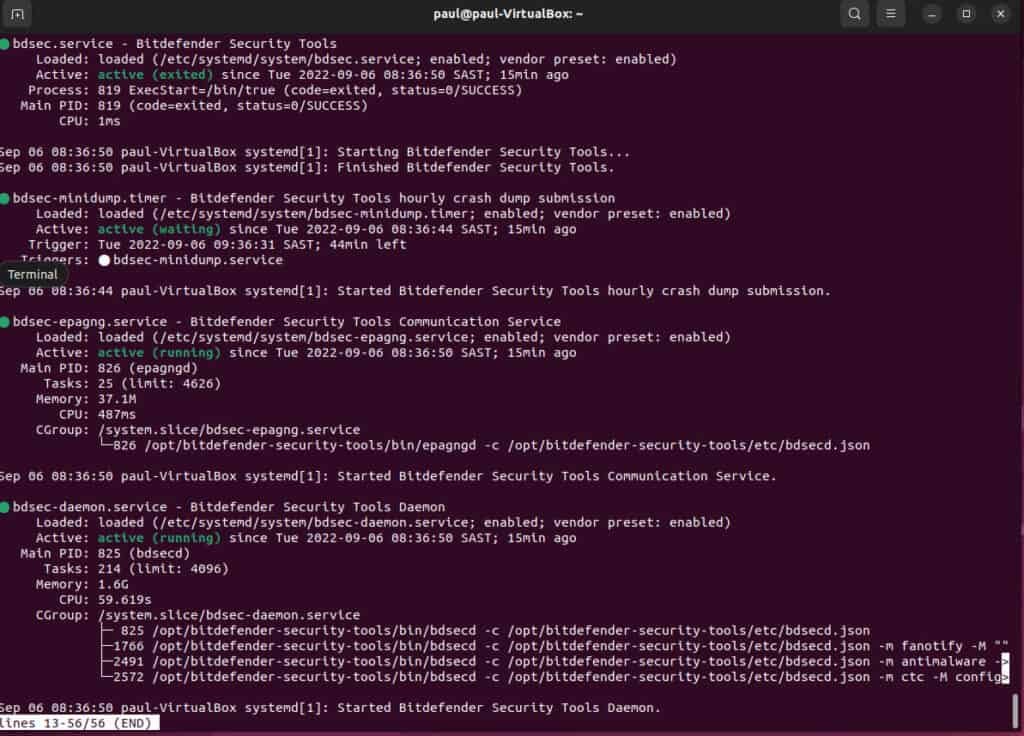
You can check Bitdefender Endpoint Security Tools services by running the following commands:
bd status - to check services status
bd start - to start services
bd stop - to stop services
bd restart - to restart services
Is your Bitdefender not updating or saying that it is offline? Make sure that all of these connections are available on your machines. This is for Linux, Windows and macOS. Just open a command line or terminal and run these commands one by one.
telnet upgrade.bitdefender.com 80
telnet update.cloud.2d585.cdn.bitdefender.net 80
telnet cloud-ecs.gravityzone.bitdefender.com 443
telnet nimbus.bitdefender.net 443
ping cloud-ecs.gravityzone.bitdefender.com
ping upgrade.bitdefender.com
ping nimbus.bitdefender.net
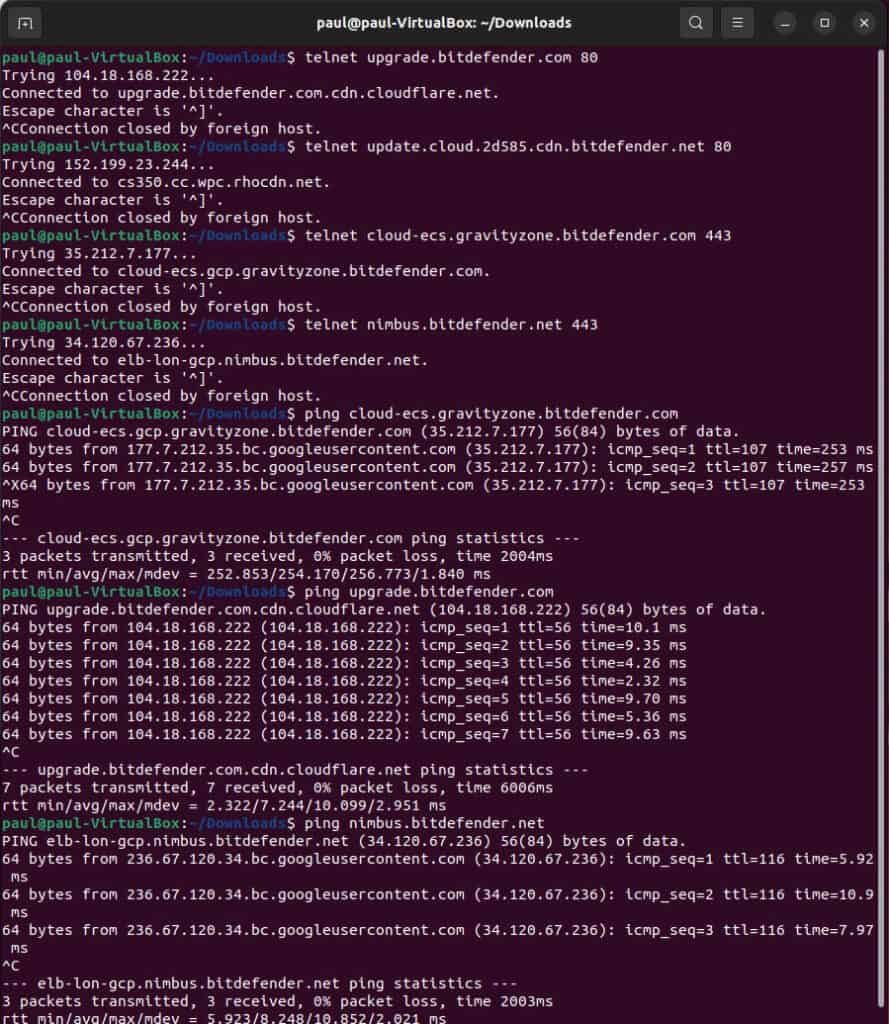
If you are working on a machine that does not have or is not allowed onto the Internet, then the only way to update and control Bitdefender is through a relay. Rather run these commands to see if you can see the relay, and the run the above commands on the relay machine to make sure that it is able to see the Internet.
telnet [IP of the Relay] 7074
ping [IP of the Relay]
To detect any system proxy:
/opt/bitdefender-security-tools/bin/bdconfigure getsystemproxy
To check all the versions that were previously installed on the machine as well as the current one, open vhist.dat:
/opt/bitdefender-security-tools/etc/vhist.dat
Installing Bitdefender on Linux is easy... well if you use these commands it is. Share on XWatch this video for a complete tutorial on how to install Bitdefender on macOS, Windows and Ubuntu Linux to give you a better understanding.
Note: This is just the beginning of how to configure this antivirus software. We go into a lot more details in the coming weeks once we finish the recordings of the other videos.
Read: How we reduced the strain on a network
You'll see that we are a Gold Bitdefender Partner with years of experience in using, setting up and deploying GravityZone and the Bitdefender Endpoint Security Tools (BEST) and we offer the best prices and support on all Bitdefender GravityZone Products.
The fact that you can install Endpoint Security Tools on Windows, Mac and Linux makes your network a lot more secure. You do not have to worry about a weak link in your cybersecurity.
When you finish installing all the endpoints on your network, make sure that you also increase the security by updating your policies to make sure that your network is as secure as possible.
Also, be sure to scan your network for Potentially unwanted applications PUA which can often compromise privacy or weaken the computer's security.
OSH.co.za is a Gold partner, the highest-ranked reseller in Gauteng, South Africa, make sure you get in contact with us on this page http://osh.co.za/bitdefender-gravityzone/ or by emailing us on support@osh.co.za.

Also, if you find the information in this post to be useful, be sure to share this post with your friends on Facebook, Twitter, and LinkedIn!
